
Reaction Roles
Seeking a simpler method to manage reaction roles in your server? Discover an efficient solution with our innovative tool!

Let's create our reaction roles embed by using
/reaction-roles createcommand and giving it a name.
The following wizard will pop up where you can specify embed configuration and all button roles associated with it.

Click
Embedbutton and give the embedTitle,Description,Hex Color,FooterandImagethen clickSubmit. Note that all these options are optional but its better to set them for a clear embed style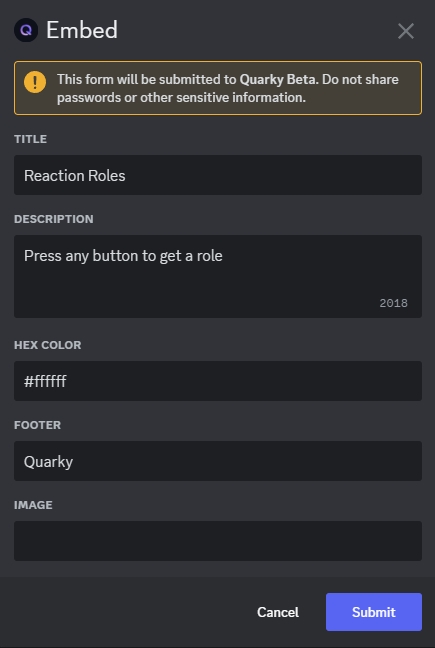
Now as you can see, the embed changed according to the configuration we set before
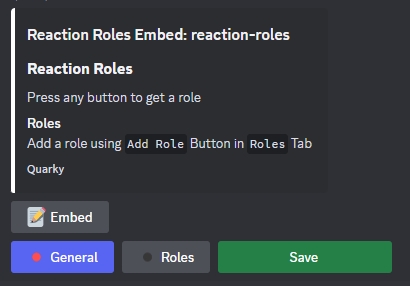
Now let's add some reaction roles to this embed. Start by pressing
Rolesbutton down below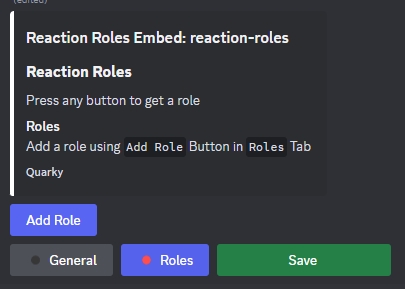
Click
Add Role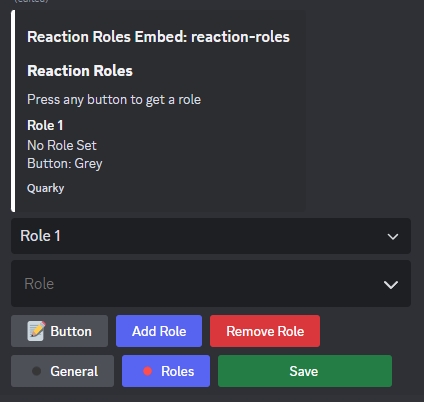
Choose from the select menu the
Roleassociated with this button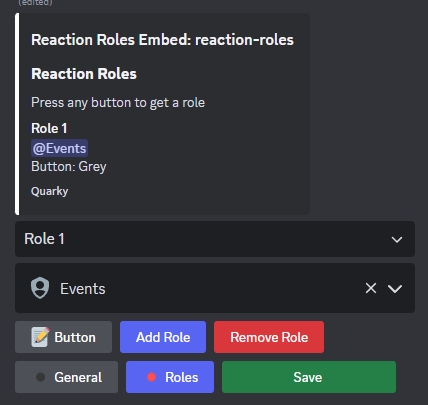
Click
Buttonto configure
Button Label: Text shown on the buttonButton Color:0for Grey,1for Blurple,2for Green and3for Red.Button Emoji: Emoji shown on the buttonthen click
Submit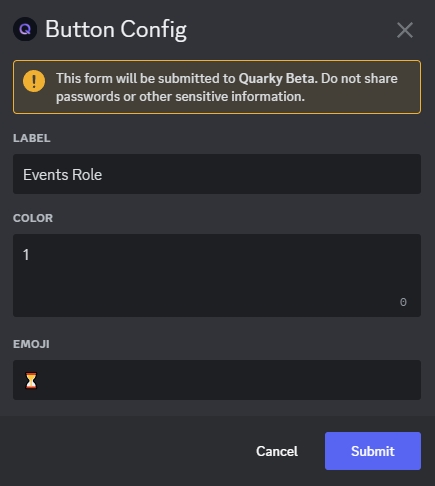
Now click
Save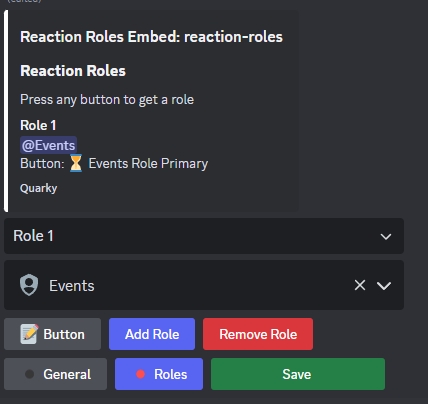
As you can see, after you click
Saveon the reaction roles embed. You can now send it to any channel you want usingSendbutton, edit it again usingEditbutton or delete it usingDeletebutton.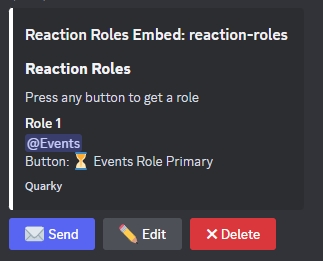
Click Send and specify a channel to send the embed to. The embed will then be sent to the channel you specified as shown below.
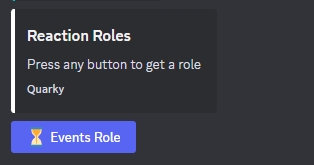
Now clicking on
Events Rolebutton will grant the user the@Eventsrole. Note that clicking the button again will remove the role.
Slash Commands
/reaction-roles create [name]- Interactive setup to create a reaction roles embed with configuration./reaction-roles get [name]- Shows a single reaction roles embed along with three functional buttons - Send, Edit, and Delete./reaction-roles list- Lists all created reaction roles embeds names.
Last updated
Was this helpful?